Archive for category Korean
Chapagetti (炸醬麵)
Posted by foodlabasia in Korean, Noodles on April 26, 2012
Let’s face it, we all get lazy sometimes. When I wanna eat something hot and don’t wanna spend too much time to prepare, I make noodles. You just boil water, put the noodles in and wait for it to soften. Viola! It’s done. What’s the quickest of the quickest noodles to cook? Of course it’d be instant noodles! What’s faster than “instant”? 😛
Last time when I went to H-Mart, I saw that the Korean noodles were on sale, so I bought 4 different flavours of instant noodles. One of them was Chapagetti. To be honest, the first time I had it (about 10 years ago?), I didn’t like it that much. I think it was because the texture of the noodles was very different from the kind that I used to have, which was a lot skinnier. As time went, I actually started to like the texture of chapaghetti more – the noodles are thicker and chewier, and it feels like it fills you up more. If you have tried the spicy Nong Shim Shin Ramyun, the chapagetti noodles is the same as the Shin Ramyun noodles.
Oh forgot to mention, you don’t serve the chapagetti in soup, rather, you serve the noodles dry. The cooking method is pretty much the same as any other types of instant noodles, except you drain the water completely when the noodles are done, and then you put a little bit of water, the packaged oil and soup base in and mix everything together. If you want to impress people and make it not look like instant noodles, you can add some veggies and meat on top.
Chapchae
Posted by foodlabasia in Korean, Noodles on October 19, 2010
Kimchi (Part 2)
Posted by foodlabasia in Korean, Vegetables on April 22, 2010
Experiment: Kimchi
Introduction:
My Kimchi is done! Please refer to here for the ingredients and recipe.
Result:
Discussions:
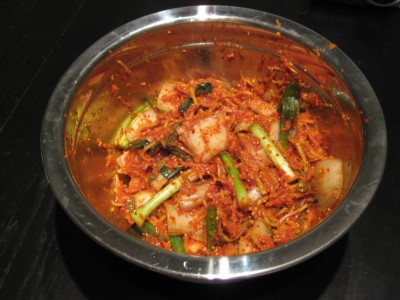
1) It’s finally done! This kimchi has been fermented for 2 weeks. I don’t kow if you can see in the picture, but there’s a bubble between the kimchi and the saran wrap. I read in other blogs that the bubble is a result of the “fermentation.” Anyways… once I open the wrap, wow…. it smelt SOOOOO GOOD! And of course, I tasted it immediately, and it tasted…
2) like Kimchi! hehe! It actually tasted pretty good! The only thing is… it’s a little spicier than the kimchi that I usually have. I think next time I’ll put less chili powder in next time.
3) I used this batch of kimchi to make Chicken and Kimchi Rice bowl. I used this recipe. I substituted chicken with pork, and I used less kimchi (coz Mr. Clam can’t take spicy food that well). It was yummy! 🙂
4) I’ll try another batch after I finish this one! Hehe! I’m just so excited!!!!
Kimichi (Part 1)
Posted by foodlabasia in Korean, Vegetables on April 5, 2010
Experiment: Kimchi
Introduction:
I saw a few Kimchi recipes on a few blogs a while ago. I never knew that I could make Kimichi at home! So after I saw those recipes, and knowing that the ingredients are quite accessible, I decided to give it a try. I modified the recipe a bit (because I don’t have some ingredients), but hopefully it’ll still taste good!
Materials:
1/2 Korean cabbage (about 500g)
1/2 Korean raddish
1/4 onion, chopped
2 tbs chopped ginger
2 tbs chopped garlic
4 bunches of green onions
4 tbs salt
Kimchi sauce:
6 tbs crushed red pepper (or red pepper powder)
6 tbs fish sauce
1 tbs sesame oil
1/2 tbs sugar
2-3 tbs sesame
Procedure:
1) Cut the cabbage into small pieces. (OR just leave the leaves as they are. There are many different ways.)
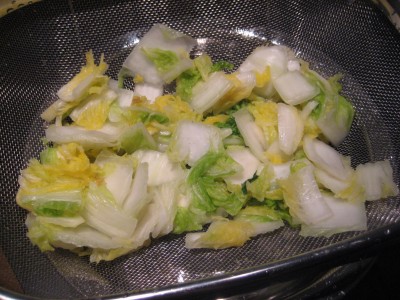
2) Put the cabbage into a big bowl, sprinkle the salt onto the cabbage. Mix the cabbage and the salt together until the cabbage leaves are soft. I think I left the cabbage in the big bowl for roughly an hour.
3) Wash away the salt from the cabbage leaves. Taste the cabbage leaves (the acutal leaf part) and see if it’s still salty. Keep washing (or soak the cabbage in cold water) the leaves until it’s not salty. And then air dry the cabbage for about 2 hours.
4) While you’re drying the cabbage, it’s time to prepare the other ingredients. Cut the green onions into 2-inches pieces. Cut the Korean raddish in half. Grate half of the radish, and thinly slice the other half of the raddish.
From top left clockwise: chopped onions, chopped ginger, thinly sliced Korean raddish, grated Korean Korean raddish, choped garlic and green onoins
5) Mix all the Kimchi sauce ingredients together in a bowl. Taste it and see if you like it. You can add more crushed red pepper if you like it really spicy.
6) When the cabbage leaves are dry, then you’re ready for the mixing! Simply put all the ingredients in a biiiiiiig bowl, and mix them together. Mix them well! It’ll start to look like kimchi.
7) Put the mixed kimchi in a container.
8) Put saran wrap on top of the kimchi. Cover the lid, then put it in the fridge for 7 days.
Result:
It’s not ready yet! I’ll post it again after 7 days… but… OH! I’ll be out of town… so maybe I’ll post it after I come back… hehe!
(Updated: Please see Part 2 here)
Discussion:
1) I didn’t know that the leaves would shrink so much… I think I should’ve used ONE whole cabbage instead of half.
2) I saw in a recipe that you can add shrimp paste in the kimchi sauce as well. Too bad I don’t have it at home! I really like the smell of shrimp paste.
3) You can also add grated apple, thinly sliced cuccumber, and thinly sliced carrots in the kimchi as well… I don’t have it at home. But I’ll definitely try them next time!
Pork and Kimchi Rice bowl (豚キムチ丼)
Posted by foodlabasia in Japanese, Korean, Rice on February 26, 2010
Experiment: Pork and Kimchi Rice Bowl (豚キムチ丼)
Introduction:
Last weekend, Mr. Clam and I went Downtown to watch some Olympic stuff. We went in a restaurant called “Ebi Ten” fo food. There I tried a rice bowl called “Buta-Kim,” and I REALLY LIKED it! When I was eating it, I thought to myself… “It shouldn’t be too hard to make at home…” So I gave it a try tonight.
Material: (serve 2-3)
200g thinly sliced pork
100g kimchi
1/4 onion, thinly sliced
1/2 tbs chopped garlic
2 tbs chopped green onion
Oil
Mayonnaise
Egg (optional)
Rice
Small pieces of lettuce
Sauce:
1 tbs mirin
1 tbs sake
1/2 tbs soy sauce
1/4 tbs sesame oil
1/2 tbs brown sugar
Salt
Procedure:
1) Mix all the sauce ingredients in a small bowl.
2) Heat up a frying pan, put some oil and chopped garlic in. Then put the onion in. Stir fry until the onion is brown and soft.
3) Put the pork in. When the pork has changes colour, put in 1) and the Kimchi. Stir fry until the pork is well cooked.
4) Now it’s time for the rice. First put the rice a rice bowl, then put some lettuce on top. Ok, now it’s time for the trick – MAYONNAISE! I never thought of putting mayonnaise in a rice bowl until I tried it at Ebi Ten. So remember to put some mayonnaise in your rice bowl! It makes it taste SO much better!
5) Now, if you like eggs like me, you can put a sunny side up egg on your lettuce. If you don’t like eggs, then you can skip this.
6) Of course, now you’ll need the kimchi pork! Just simply put the pork on the lettuce, and green onion on top of the prok. Viola! There’s your Pork and Kimchi rice bowl!
Results:
Discussions:
1) It was suprisingly good! And the good thing is it doesn’t take long to make! I think from cutting the onion to the finished product, it took me less than 20 mins. 🙂
2) I think I’ll start to put mayonnaise on EVERYTHING now coz it tastes so good!


